
how to brown ground beef perfectly. I used to rush dinner and end up with a sad, gray pile of meat that tasted flat and watery. If that sounds like your skillet story too, you are not alone. The good news is that perfect browning is simple once you know a few tiny truths. We will go step by step with real world tips, so you get juicy, flavorful bits that make tacos, pasta, and casseroles sing.

What to Look for When Buying Ground Beef
Great browning starts at the store. If you can, choose 80 percent lean and 20 percent fat for the best balance of flavor and moisture. That little bit of fat helps with caramelization and keeps the meat from tasting dry. If you prefer leaner, 85 percent lean works fine, just use a bit more oil in the pan.
Check the color. You want a fresh, bright red on the outside. A little brown on the inside is normal because less oxygen reaches there. Avoid packages with gray patches on the outside or excessive liquid pooling in the tray. Liquid in the package means more steaming in your pan and less browning.
Grind size matters. Coarser grinds brown better because they have more surface area and do not clump as easily. If your store grinds in house, ask for a coarse grind. Check the date and aim for the coldest package from the back of the fridge case, since those often have better turnover.
Finally, buy what you need or portion and freeze right away. Smaller one pound packs are easy to thaw evenly, which helps your skillet brown instead of steam.
What You’ll Need to Brown Ground Beef
You do not need much to nail it, but a few tools and staples make a big difference.
- Heavy skillet: Cast iron or stainless gives the best crust. Nonstick works but yields lighter browning.
- High heat cooking fat: A teaspoon of neutral oil or a dab of beef tallow helps with sear, especially with lean meat.
- Ground beef: 1 pound is easy to manage for even browning.
- Salt and pepper: Start simple. Add spices after browning if you want.
- Sturdy spatula: A flat edge helps you press and scrape browned bits.
- Paper towels: For patting dry and quick cleanups.
That is it. Easy, right? The pan, heat, and patience will do most of the work for you.
How to Brown Ground Beef
These four small steps turn pale, soggy meat into flavorful, browned crumbles you will be proud of. Keep the heat up, resist stirring, and let the skillet do its thing. Below is a quick reference snapshot you can copy and keep on your phone.
Step 1: Preheat the pan and prep the meat
Place your skillet over medium high heat and give it a full 3 minutes to get hot. A hot pan is your shortcut to flavor. If you are using lean beef, add a teaspoon of oil and swirl to coat.
Pat the beef dry with a paper towel. Moisture is the enemy of browning. Break the meat into 3 or 4 big chunks, not crumbles yet. Sprinkle on a pinch of salt to start bringing out flavor.
Step 2: Let it sizzle, then leave it alone
Place those big chunks in the hot pan and press gently with your spatula to get full contact. You should hear a lively sizzle. If not, the pan was not hot enough, so give it another 30 seconds before adding the rest.
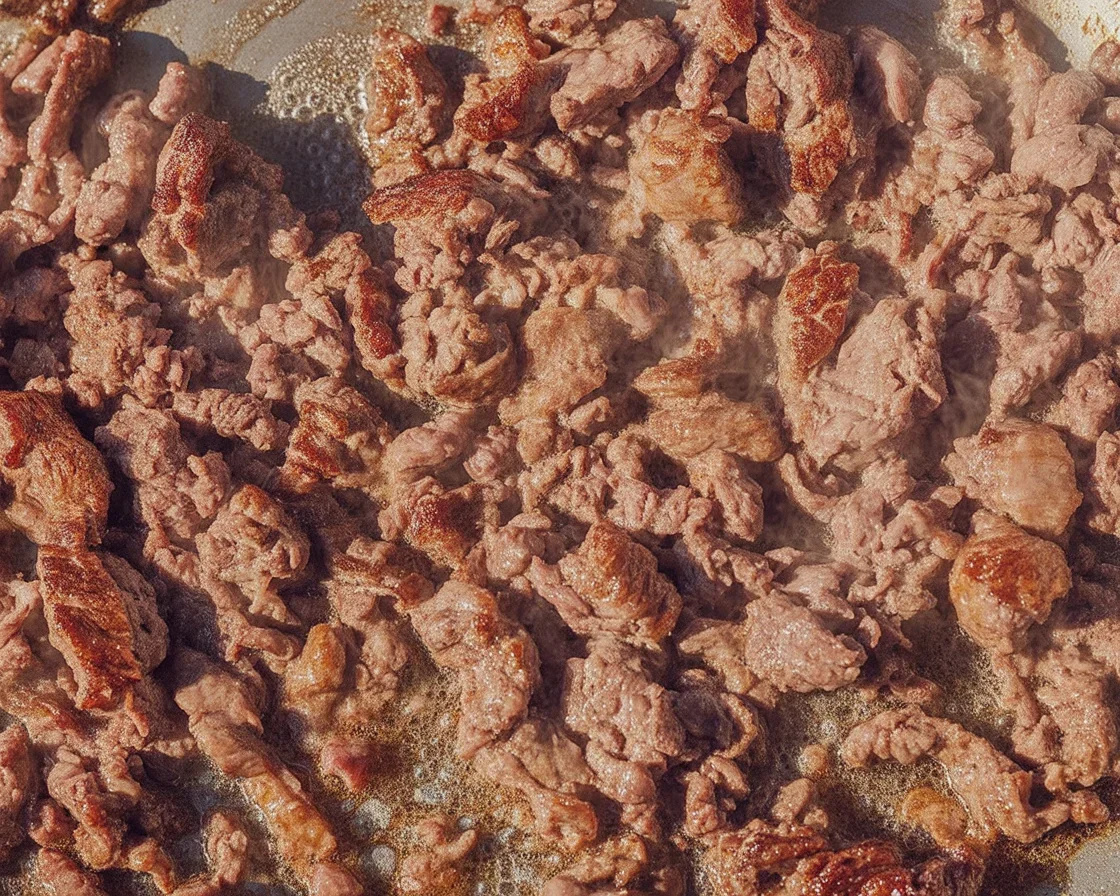
Now the big key: do not stir for 2 to 3 minutes. This allows the underside to build a brown crust. Browning equals flavor. If you stir too soon, the meat releases moisture and steams instead of sears.
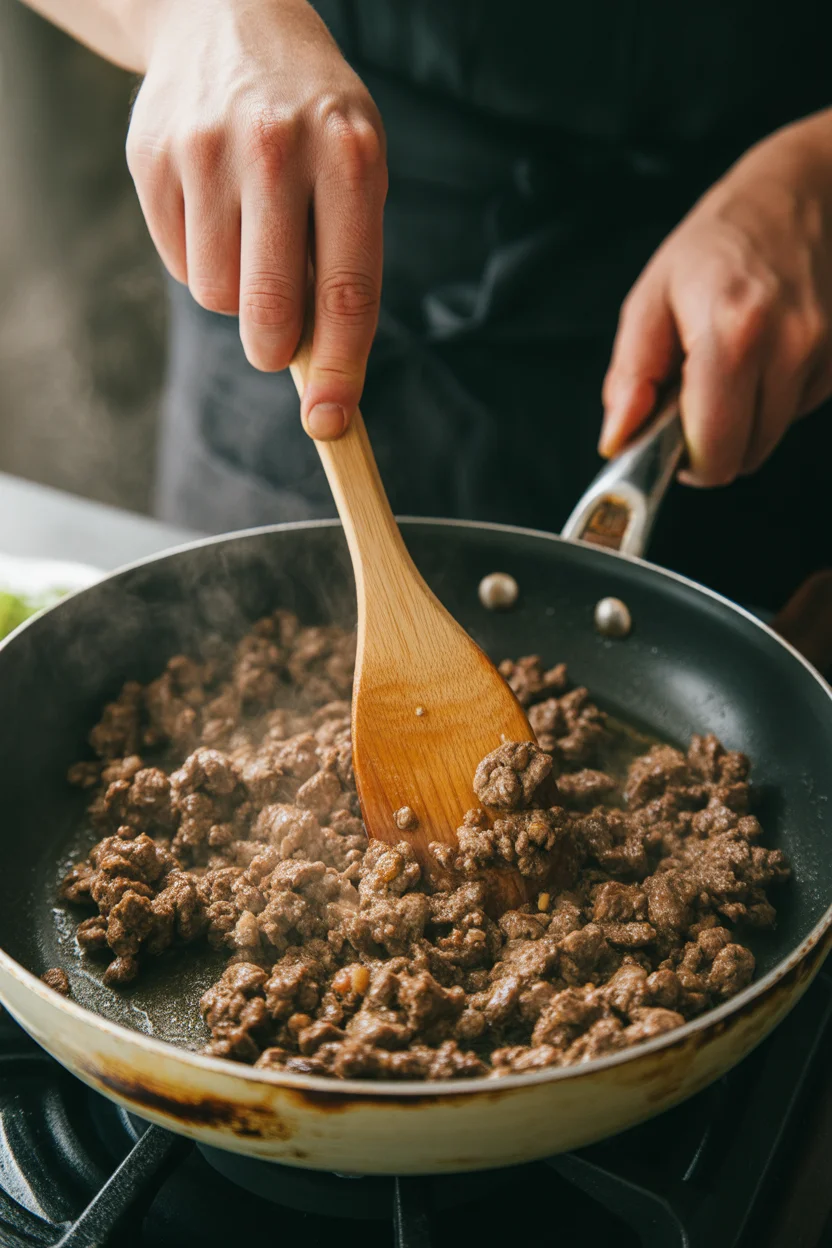
Step 3: Break it up and season
Once the underside is browned, flip the chunks. Now start breaking the meat into medium crumbles. Not too tiny, not too chunky. Smaller pieces can dry out, and giant pieces do not season evenly.
Season with more salt and pepper. If you plan on tacos, chili, or pasta sauce, sprinkle spices now so they bloom in the fat. Stir every minute, scraping up browned bits from the bottom. If you see a lot of liquid, tilt the pan and spoon some out so the beef keeps browning.
Step 4: Finish and adjust
Cook until the meat is 160 F in the center for food safety. Taste and adjust salt. If you are using the beef for sauce or tacos, you can stir in garlic, onions, or spices in the last minute so they do not burn.
Want extra caramelization? Spread the crumbles out, press lightly, and give them one more minute without stirring. That simple pressure creates more contact, more browning, and deeper flavor.
how to brown ground beef perfectly.
Helpful Tips for Cooking Ground Beef
- Cook in batches: One pound per 10 to 12 inch skillet is ideal. If the pan is crowded, the beef steams and turns gray.
- Use medium high heat: Too low and you get pale, soggy meat. Too high and it smokes before browning.
- Salt in stages: A pinch when the meat hits the pan and another pinch after browning. Layered seasoning tastes better.
- Manage moisture: If liquid pools, scoop some out. Browning needs a dry surface.
- Save the fat: A spoonful adds rich flavor to rice, veggies, or eggs. Store it covered in the fridge for a week.
- Flavor boosters: A splash of Worcestershire, soy sauce, or a pat of butter at the end gives instant depth.
- Pair it smart: Crisp, tangy sides make the beef taste even richer. Try this bright and crunchy side for tacos or bowls: tangy quick pickled slaw.
“I followed your timing and the leave it alone rule, and my Tuesday tacos were the best I have ever made. Real brown edges, juicy bites, and no gray mush. Game changer.”
Ground Beef Troubleshooting Guide: 3 Common Mistakes to Avoid
Mistake 1: Crowding the pan. Too much meat drops the temperature and traps steam. Use a big pan or cook in two rounds. You will actually cook faster because the beef browns quickly when it has space.
Mistake 2: Stirring too soon. It is tempting to poke the meat right away, but you need those first 2 to 3 minutes of untouched time to build a crust. That crust is why restaurant beef tastes better. Slow down and you will taste the difference.
Mistake 3: Starting with cold or icy meat. If the beef is partly frozen, it releases extra water and refuses to brown. Thaw in the fridge overnight or break the pound into smaller chunks and thaw quickly in a sealed bag under cold water. Then proceed with the steps for how to brown ground beef perfectly.
Common Questions
Do I need to drain the fat? It depends on your dish and your beef. With 80 percent lean, I usually spoon off a little but keep a tablespoon for flavor. For leaner meat, there is not much to drain anyway.
When should I season? Start with a light sprinkle of salt at the beginning and season more after browning. Add dried spices once the meat has some color so they bloom in the fat.
Can I brown frozen ground beef? For best results, thaw first. If you must cook from frozen, cover the pan for a few minutes to thaw, then uncover and let the moisture cook off before you start browning. It will not be as evenly browned, but it works in a pinch.
How do I get smaller crumbles? After the first flip, use a potato masher or the edge of your spatula to gently chop the meat. Do this a few times during cooking until the pieces are the size you like.
What temperature is safe? Aim for 160 F in the thickest bits. If you do not have a thermometer, cook until no pink remains and the juices run clear.
Skillet Confidence, Unlocked
You now have the simple steps, the timing, and the little tricks that make big flavor. With a hot pan, space to breathe, and patience, your skillet will deliver rich browned bits every time. Keep this routine and you will never wonder again how to brown ground beef perfectly.
Try it tonight and taste the difference. Once you nail it, tacos, sloppy joes, pasta sauce, and casseroles get an easy upgrade.
Browned Ground Beef
Ingredients
Method
- Place your skillet over medium-high heat and wait 3 minutes for it to get hot.
- Pat the beef dry with paper towels, breaking it into 3 or 4 large chunks.
- Sprinkle on a pinch of salt.
- Place the chunks of beef in the hot pan, pressing gently to ensure full contact. Let it sizzle for 2-3 minutes without stirring.
- After 2-3 minutes, flip the chunks to brown the other side and start breaking it into medium-sized crumbles.
- Season with additional salt and pepper, and add any desired spices for dishes like tacos or pasta.
- Cook until the meat reaches 160°F in the center or no pink remains, adjusting salt as needed.
Leave a Reply