

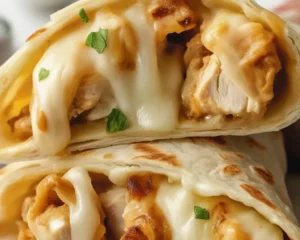
Cheesy Garlic Chicken Wraps are the cure for boring lunches. If your midday meal feels like a chore, these warm, melty, garlicky wraps will flip that script fast. They’re quick, comforting, and surprisingly balanced, with juicy chicken, fresh greens, and a creamy garlic kick that tastes like takeout but better. I make a batch at the start of the week and never worry about what to eat when hunger hits. Stick around and I’ll show you how to make them crispy on the outside, gooey inside, and just garlicky enough to keep you excited for lunch tomorrow too. 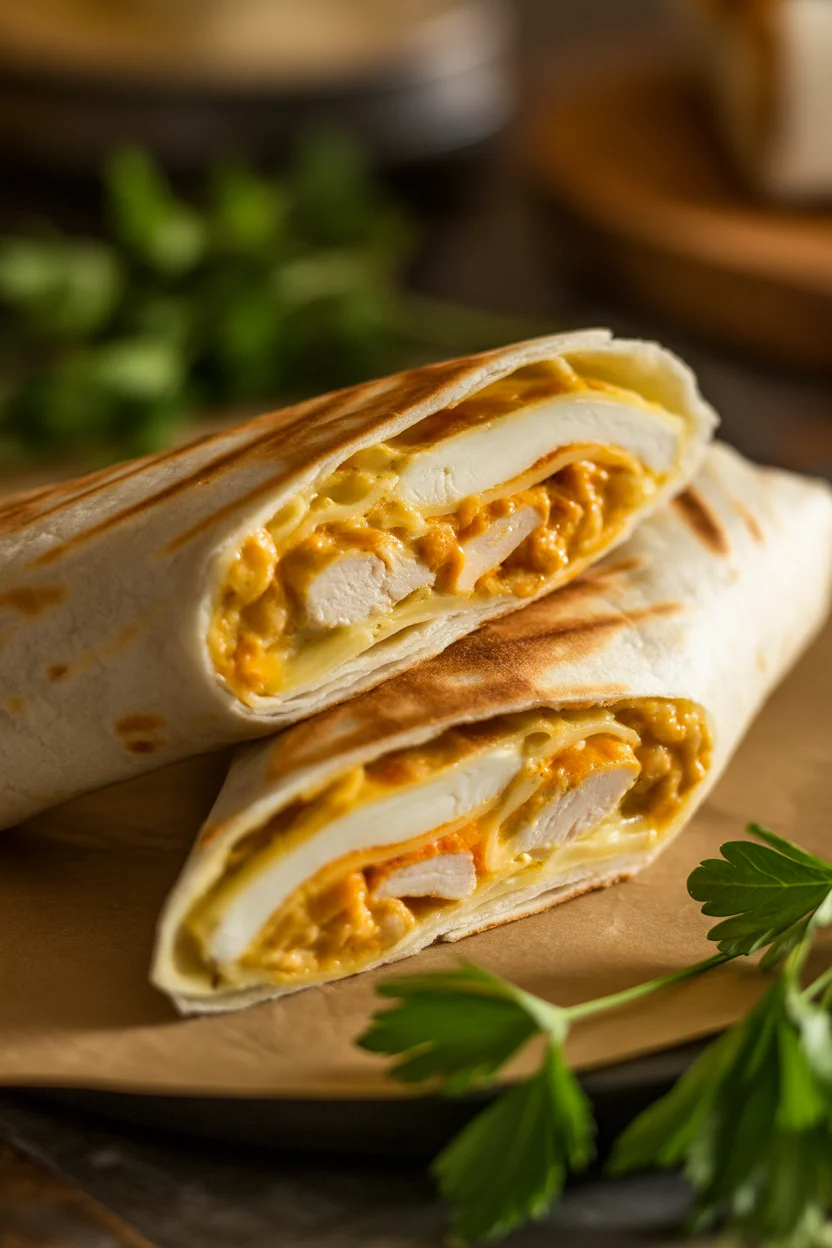
Ingredients for Cheesy Garlic Chicken Wraps
What you’ll need
Here’s the simple setup I use. You can swap in what you have, but this combo hits all the right notes: salty, creamy, crunchy, and fresh.
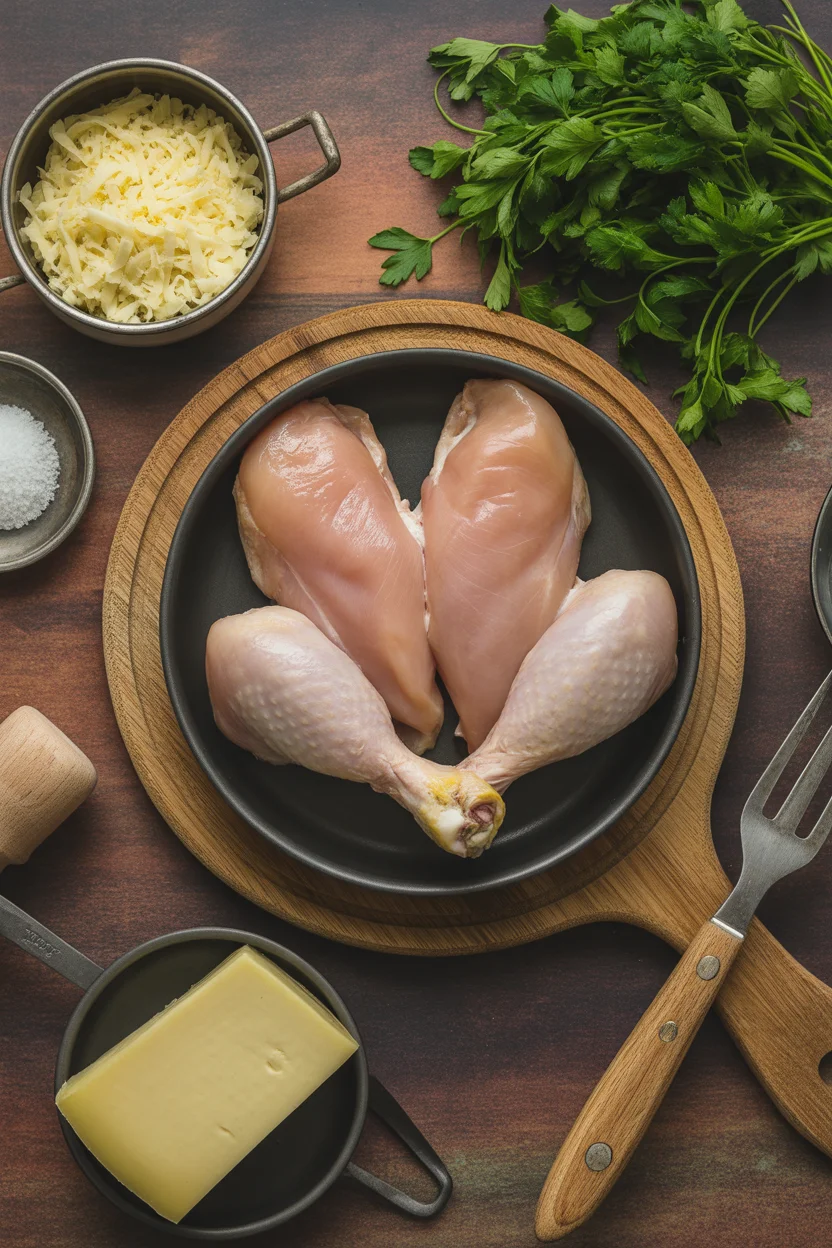
- 2 large chicken breasts or 3 chicken thighs, thinly sliced
- 1 tablespoon olive oil
- 1 teaspoon salt and 1/2 teaspoon black pepper
- 1 teaspoon smoked paprika or regular paprika
- 1/2 teaspoon garlic powder, plus fresh garlic below
- 2 to 3 garlic cloves, minced
- 1 tablespoon butter for the pan
- 4 large flour tortillas or your favorite wraps
- 1 to 1 1/2 cups shredded mozzarella or Monterey Jack
- 1/2 cup shredded cheddar for extra tang
- 1/4 cup mayonnaise
- 2 tablespoons Greek yogurt or sour cream
- 1 teaspoon lemon juice
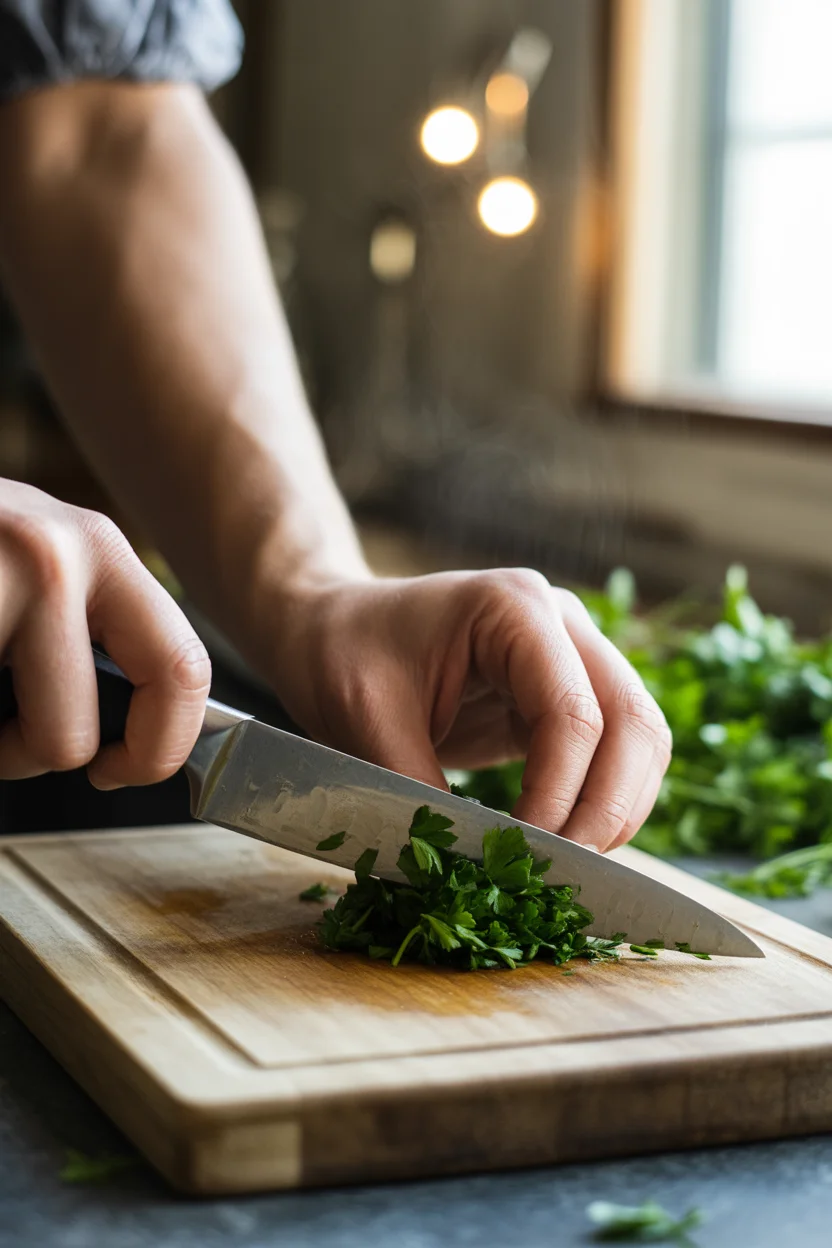
- 1 tablespoon chopped parsley or chives
- 1 cup baby spinach or romaine, chopped
- 1 small tomato, seeded and diced, optional
- Pickled onions or sliced red onion, optional
- Hot sauce for a kick, optional
That little mix of mayo, yogurt, lemon, and minced garlic makes a simple creamy garlic sauce that ties everything together. If you prefer, you can use ranch or Caesar dressing and a pinch of garlic powder, but I think fresh garlic makes the wrap sing.
How to Make Cheesy Garlic Chicken Wraps
Step-by-step that’s actually easy
- Season the chicken. In a bowl, toss sliced chicken with olive oil, salt, pepper, paprika, and garlic powder. Let it sit while you prep the sauce and veggies.
- Mix the garlic sauce. Stir together mayo, yogurt, lemon juice, minced garlic, and herbs. Taste. If you want more tang, add a little more lemon. If it’s too strong, add a spoon of yogurt.
- Cook the chicken. Heat a skillet over medium-high, melt the butter, then add the chicken. Don’t stir too much. Let it sear until the edges get golden and the inside is cooked through. Internal temp should hit 165 F.
- Warm the tortillas. You can do this right in a clean skillet or pop them in the microwave for 10 to 15 seconds so they’re flexible and won’t tear.
- Assemble. Spread a thin layer of garlic sauce over each tortilla. Pile on chicken, then cheese, then greens and any extras like tomato or onions. I like a small extra drizzle of sauce on top.
- Wrap and toast. Fold the sides in, then roll it up tight. Place seam side down in a lightly oiled skillet over medium heat. Press gently with a spatula until the outside is golden and the cheese is melted. Flip and repeat.
- Serve hot. Slice in half and enjoy the melty cheese, juicy chicken, and that lovely garlicky aroma.
“I made these for my lunch before a busy shift, and my teen stole the second wrap. We now double the recipe. Crispy outside, creamy inside. Perfect.”
Quick note on timing: this whole thing takes around 25 minutes if you multitask a bit. Cook the chicken while the sauce rests, and keep toppings ready to go. If you’re cooking for a crowd, you can keep finished wraps warm on a low oven rack so the outside stays crisp.
Tips for the Best Cheesy Garlic Chicken Wraps
Little upgrades that pay off
Use thighs if you like extra tenderness. Chicken thighs stay juicy and never feel dry, which makes a big difference in a wrap. If you stick with breasts, slice them thin and don’t overcook.
Layer smart for the best bite. I go sauce, chicken, cheese, then greens. Putting cheese next to hot chicken means faster melting and that dreamy pull when you slice. The greens on top avoid wilting and keep some crunch.
Toast low and slow. A medium heat gives you a crispy exterior without burning while the inside warms through. If you go too hot, the tortilla burns before the cheese melts. Press lightly with a spatula or use a grill press if you have one.
Make it your own. Swap mozzarella for pepper jack if you like heat. Add a smear of pesto or a spoon of caramelized onions for a sweet, savory twist. If you want a lighter vibe, use a whole wheat wrap and extra greens.
Prep chicken in advance. Cook a big batch of chicken once and build wraps all week. If you want a simple sheet pan option to cook chicken and veggies together, try this easy dinner idea: sheet pan chicken tenderloin with veggie medley. It saves time and tastes amazing in wraps the next day.
Keep food safety in mind. If you’re packing these to go, let the chicken cool slightly before wrapping so steam doesn’t make the tortilla soggy. Use an insulated bag with an ice pack if you won’t eat within two hours.
What to Serve with Cheesy Garlic Chicken Wraps
Simple sides that make lunch feel complete
These wraps are hearty, but a little crunch or freshness on the side makes them feel like a full meal. I love a small bowl of crisp coleslaw or baby carrots with hummus. If you want a warm side, air fryer potato wedges are a winner. For something lighter, slice cucumbers, toss with lemon and salt, and let them chill in the fridge while you cook.
If you’re building a lunchbox, add some grapes or apple slices and a square of dark chocolate for a fun finish. For a lighter lunch on another day, these savory egg salad lettuce wraps are fresh and packable too.
Want to go big? Serve with a cup of tomato soup or a fresh green salad with lemon vinaigrette. The tang of the dressing plays really well with the rich, garlicky filling.
Storage and Reheating Instructions
Make ahead without losing the crisp
Store components separately if you can. Keep cooked chicken and sauce in the fridge up to 4 days. Wash and dry greens well so they stay perky. Grate cheese ahead to save time. When it is time to eat, assemble and toast fresh for the best texture.
If you need to store assembled wraps, skip the tomatoes and wet veggies. Wrap tightly in foil or reusable wrap and keep in the fridge up to 24 hours. To reheat, place in a skillet over medium heat and cook a few minutes per side until the outside is crisp and the cheese is melted. You can also use a panini press.
Microwave method works in a pinch, but the tortilla softens. If you must, microwave for 45 to 60 seconds, then finish in a dry skillet for 1 to 2 minutes to bring back the toasty bite.
Freezing tip: Freeze only the cooked chicken. It reheats well and makes future wraps almost instant. Thaw overnight in the fridge or gently in a covered skillet with a splash of water.
Common Questions
Quick Q and A
Can I use rotisserie chicken? Absolutely. Shred it, warm it in a skillet with a touch of butter and garlic, then build your wrap. It is fast and flavorful.
What cheese melts best? Mozzarella and Monterey Jack melt beautifully. A little cheddar adds flavor, but it is less stretchy. Mix them for the best of both worlds.
How do I keep the wrap from tearing? Warm your tortilla first and do not overload it. Fold the sides in, then roll tightly so it seals and toasts evenly.
Can I make this gluten free? Yes. Use gluten free tortillas and check your seasonings. Corn tortillas can work if you double them and toast gently.
What if I don’t love garlic? Reduce the fresh garlic and lean on garlic powder. Or swap for a simple ranch or Caesar dressing and add a squeeze of lemon.
Ready to wrap and roll
That is it. With a little prep and a few smart steps, you get a lunch that feels cozy, satisfying, and totally doable on a busy day. If you love playing with flavors, check out more takes like these Southwest chicken bowls for easy dinner nights, then circle back to your new favorite lunch. If you want more inspiration, I also recommend browsing ideas like Cheesy Garlic Chicken Wraps and this quick guide, Cheesy Garlic Chicken Wraps: A Deliciously Easy Meal for fresh spins and serving ideas. Now go make your kitchen smell amazing and enjoy that first crunchy bite with all the garlicky goodness inside. 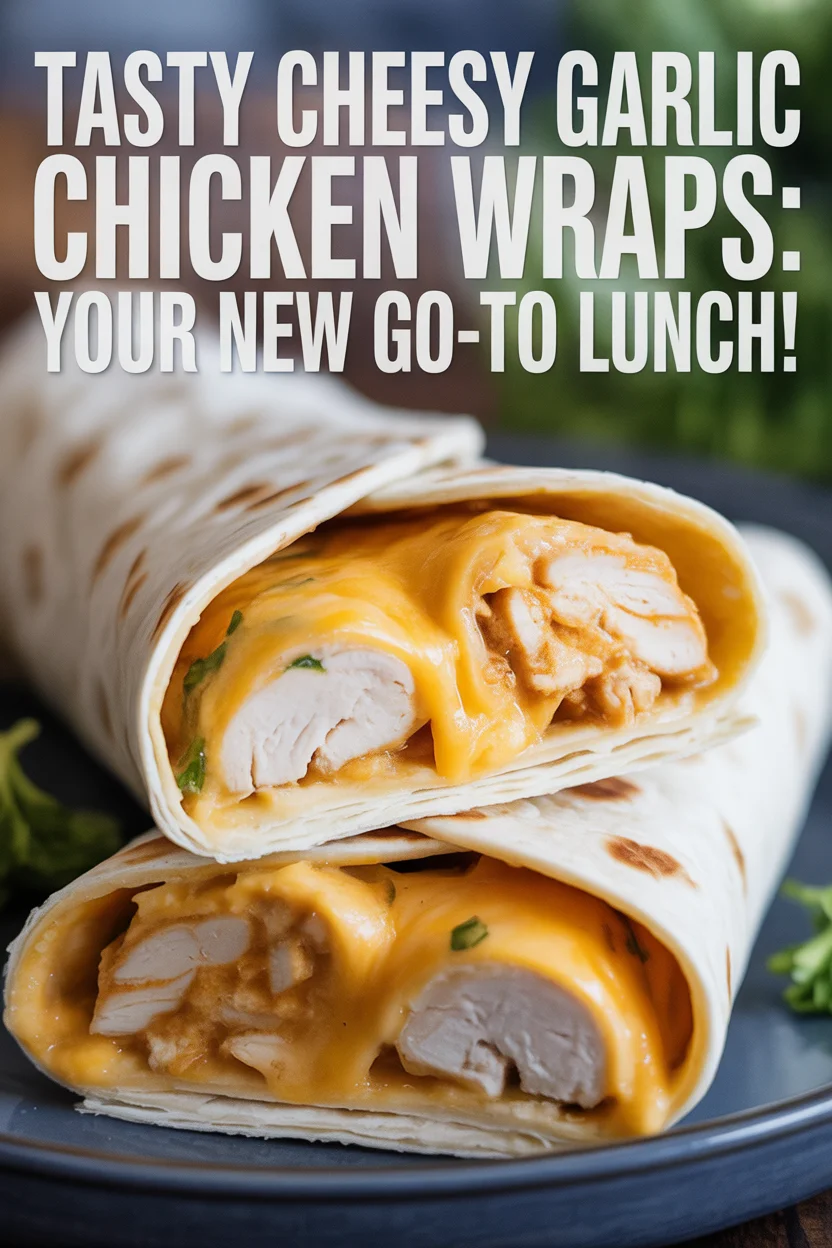
Cheesy Garlic Chicken Wraps
Ingredients
Method
- In a bowl, toss sliced chicken with olive oil, salt, pepper, paprika, and garlic powder. Let it sit while you prep the sauce and veggies.
- Stir together mayo, yogurt, lemon juice, minced garlic, and herbs to make the garlic sauce. Taste and adjust lemon for tang.
- Heat a skillet over medium-high, melt the butter, then add the chicken. Sear until golden and cooked through (165 F internal temp).
- Warm the tortillas in a clean skillet or microwave for 10-15 seconds until flexible.
- Spread a thin layer of garlic sauce over each tortilla. Pile on chicken, then cheese, then greens, and any extras.
- Fold the sides in, roll it up tight, and place seam side down in a lightly oiled skillet over medium heat. Press gently with a spatula until golden and cheese is melted. Flip and repeat.
- Slice in half and enjoy.
Leave a Reply