
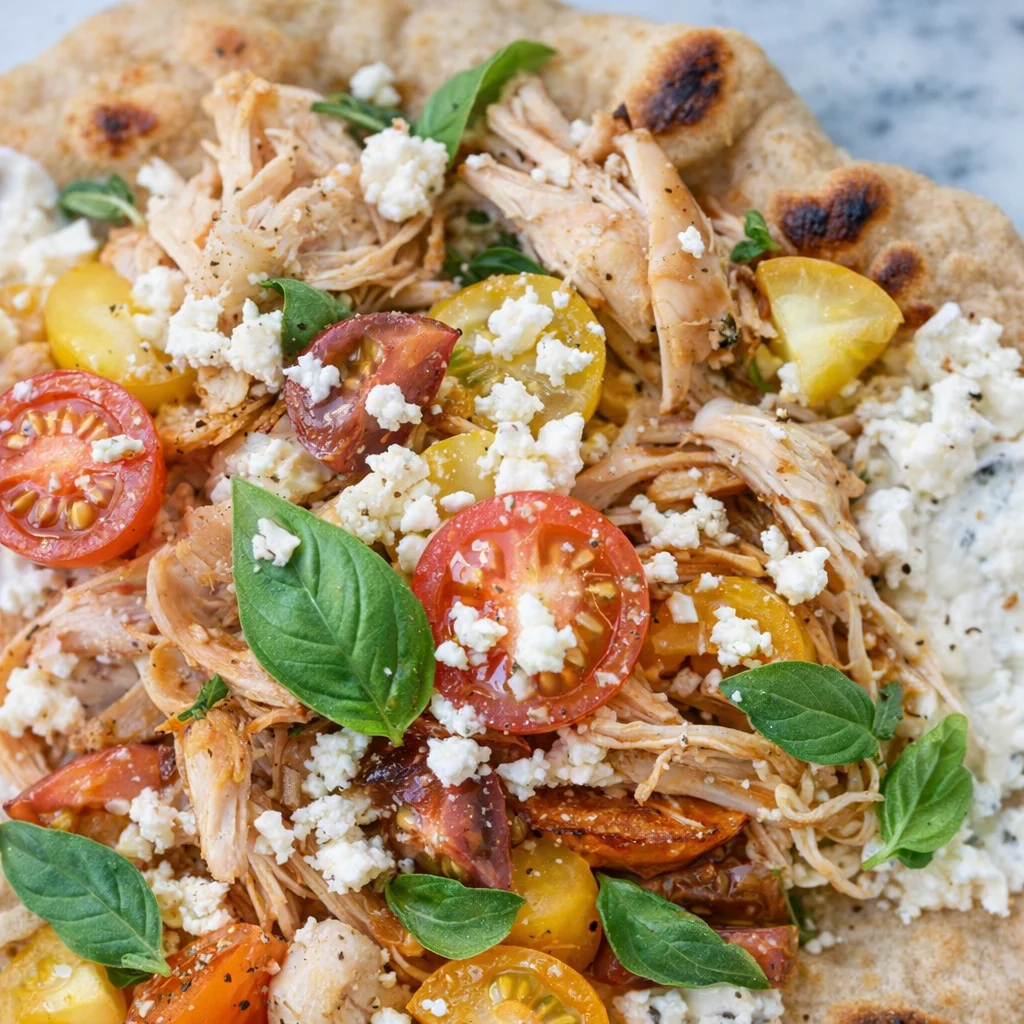
Crispy Pita with Chicken & Feta is my go to dinner when I am tired, hungry, and honestly not in the mood to wash a sink full of dishes. You know those nights when you want something crunchy and comforting, but you also want it to feel kind of fresh? This is that meal. It is cheesy, savory, and packed with flavor, but it still comes together with simple grocery store stuff. Plus, it makes the kitchen smell so good that everyone magically wanders in asking what is for dinner. 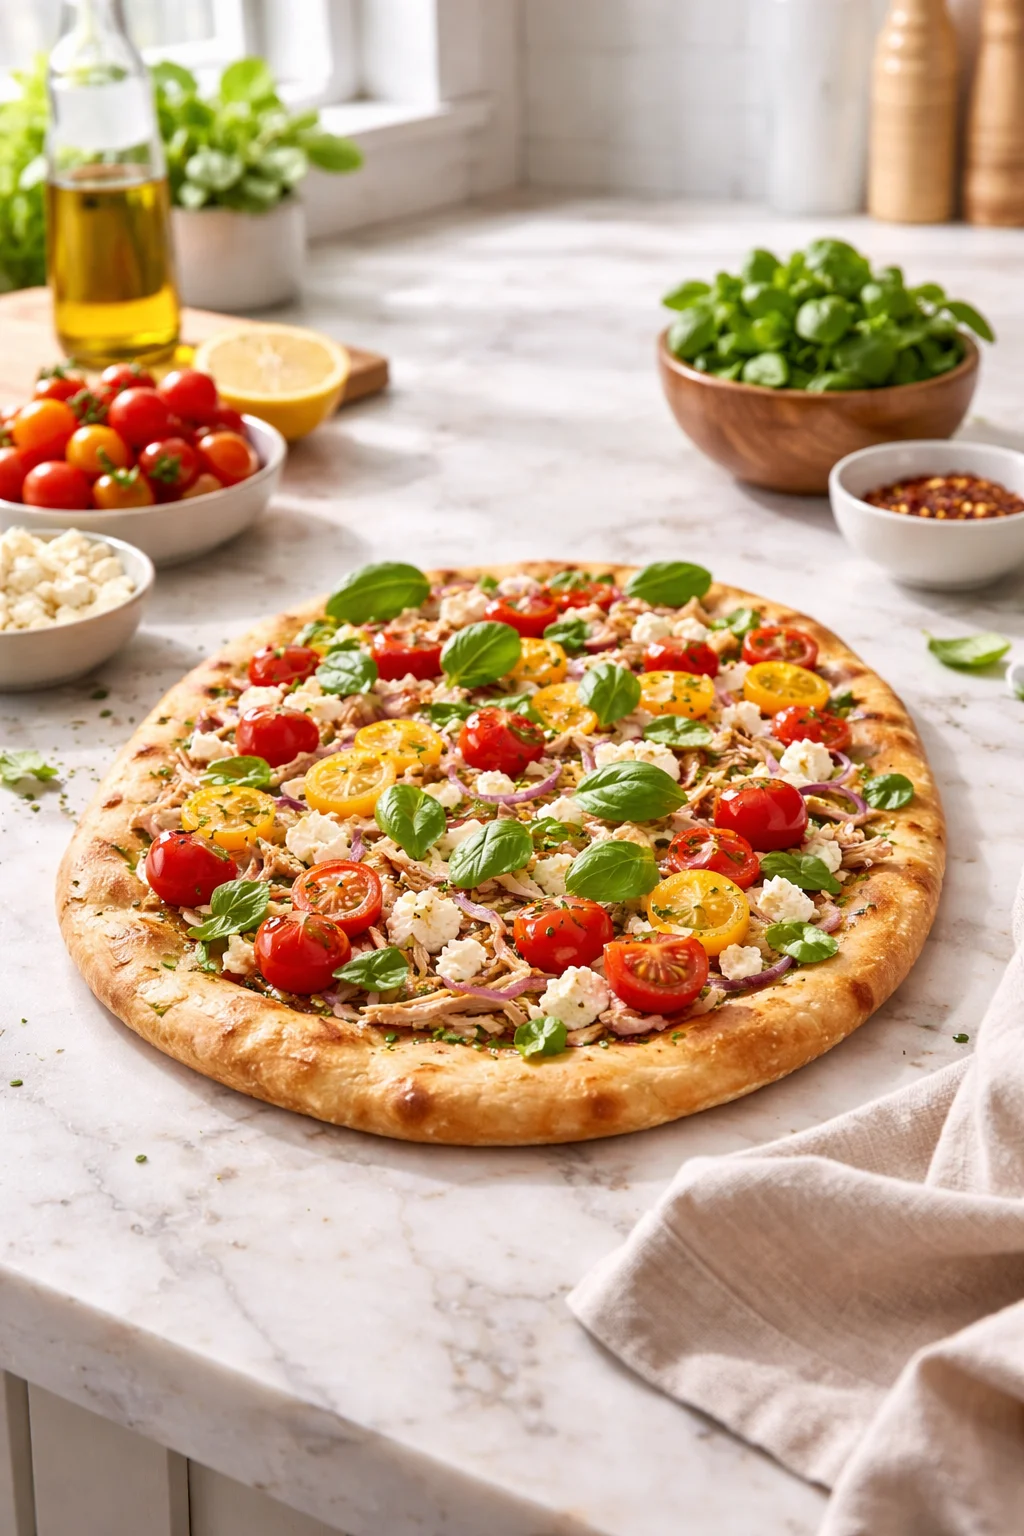
Helpful Cooking Tips
The magic of this recipe is the contrast between the crispy outside and the juicy filling. If you have ever had a pita turn out dry or kind of stiff, do not worry, a few small moves make a big difference.
Little tricks that make a big difference
Use medium heat and give it time. Too hot and the pita browns before the chicken cooks through. I like to think of it like grilled cheese rules: slow and steady wins. Also, do not overstuff. I know it is tempting, but if the pita cannot close, the filling steams out and you lose that crispy vibe.
Here are my favorite practical tips:
- Choose sturdy pita: thicker pocket pitas or Greek style pitas hold up best.
- Finely chop the chicken: smaller pieces cook evenly and stay juicy.
- Feta goes further than you think: a little adds a big punch, so you do not need to overload it.
- Press the pita lightly: a spatula press helps the pita crisp and the filling heat evenly.
- Let it rest for 2 minutes: it keeps the filling from sliding out when you slice.
Also, if you are already in a chicken mood this week, you might like this cozy bake on my site: creamy garlic chicken with mushrooms broccoli rice bake. It is totally different vibes, but it hits the same comfort button.
Ingredients for Pita Recipes
I keep this ingredient list pretty simple, because the whole point is that you can make it without a special shopping trip. The flavor comes from a few bold basics: salty feta, warm spices, and a little lemon to wake everything up.
Main keyword moment because yes, we are making Crispy Pita with Chicken & Feta the easy way, with ingredients you can actually find.
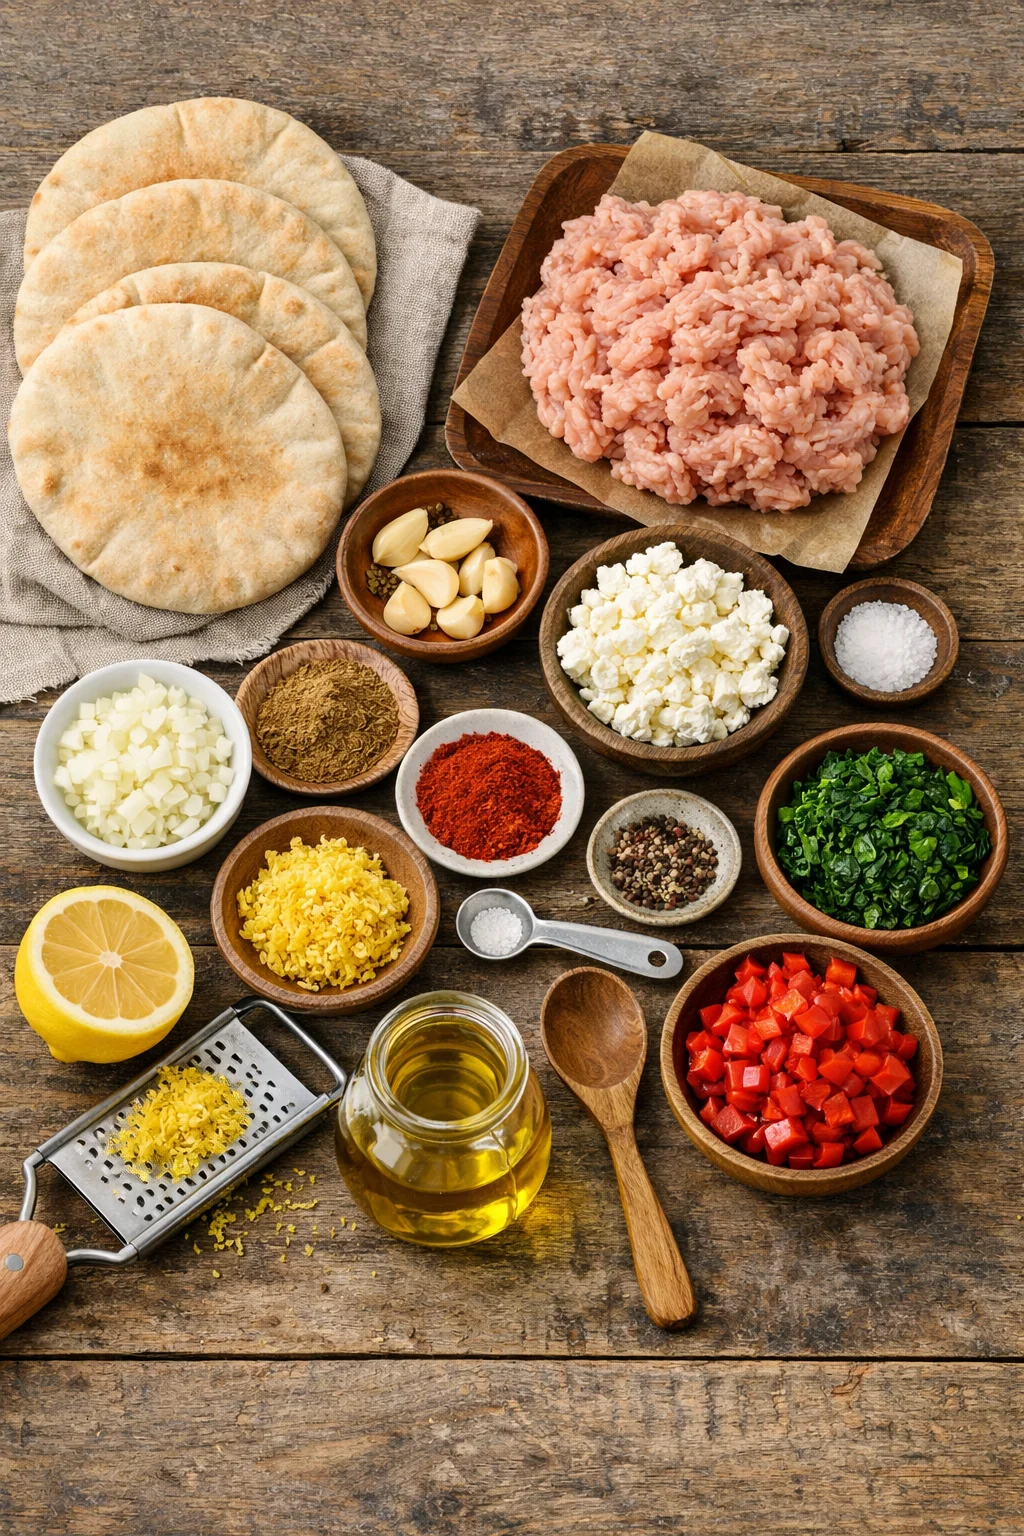
Here is what I use most of the time:
- Pita bread: 4 pocket pitas, or 6 smaller ones
- Ground chicken: 1 pound (or very finely chopped cooked chicken in a pinch)
- Feta cheese: 1/2 cup crumbled
- Garlic: 2 to 3 cloves, minced
- Onion: 1/3 cup finely chopped (or 1 teaspoon onion powder)
- Spices: 1 teaspoon cumin, 1 teaspoon paprika, 1/2 teaspoon salt, pepper to taste
- Lemon: zest of 1 lemon plus a squeeze for serving
- Fresh herbs: chopped parsley or dill if you have it
- Olive oil: for brushing the pita and pan
- Optional add ins: chopped spinach, chopped roasted red peppers, or a pinch of chili flakes
If you love feta in general, I also have a fish recipe that feels a little fancy but is still weeknight friendly: stuffed salmon with spinach feta in 30 minutes.
Step-by-Step Cooking Instructions
This is the part where it all comes together. I usually do it in a skillet, but you can also bake them if you want a more hands off vibe. Either way, you are chasing that golden, crispy pita situation.
My simple skillet method
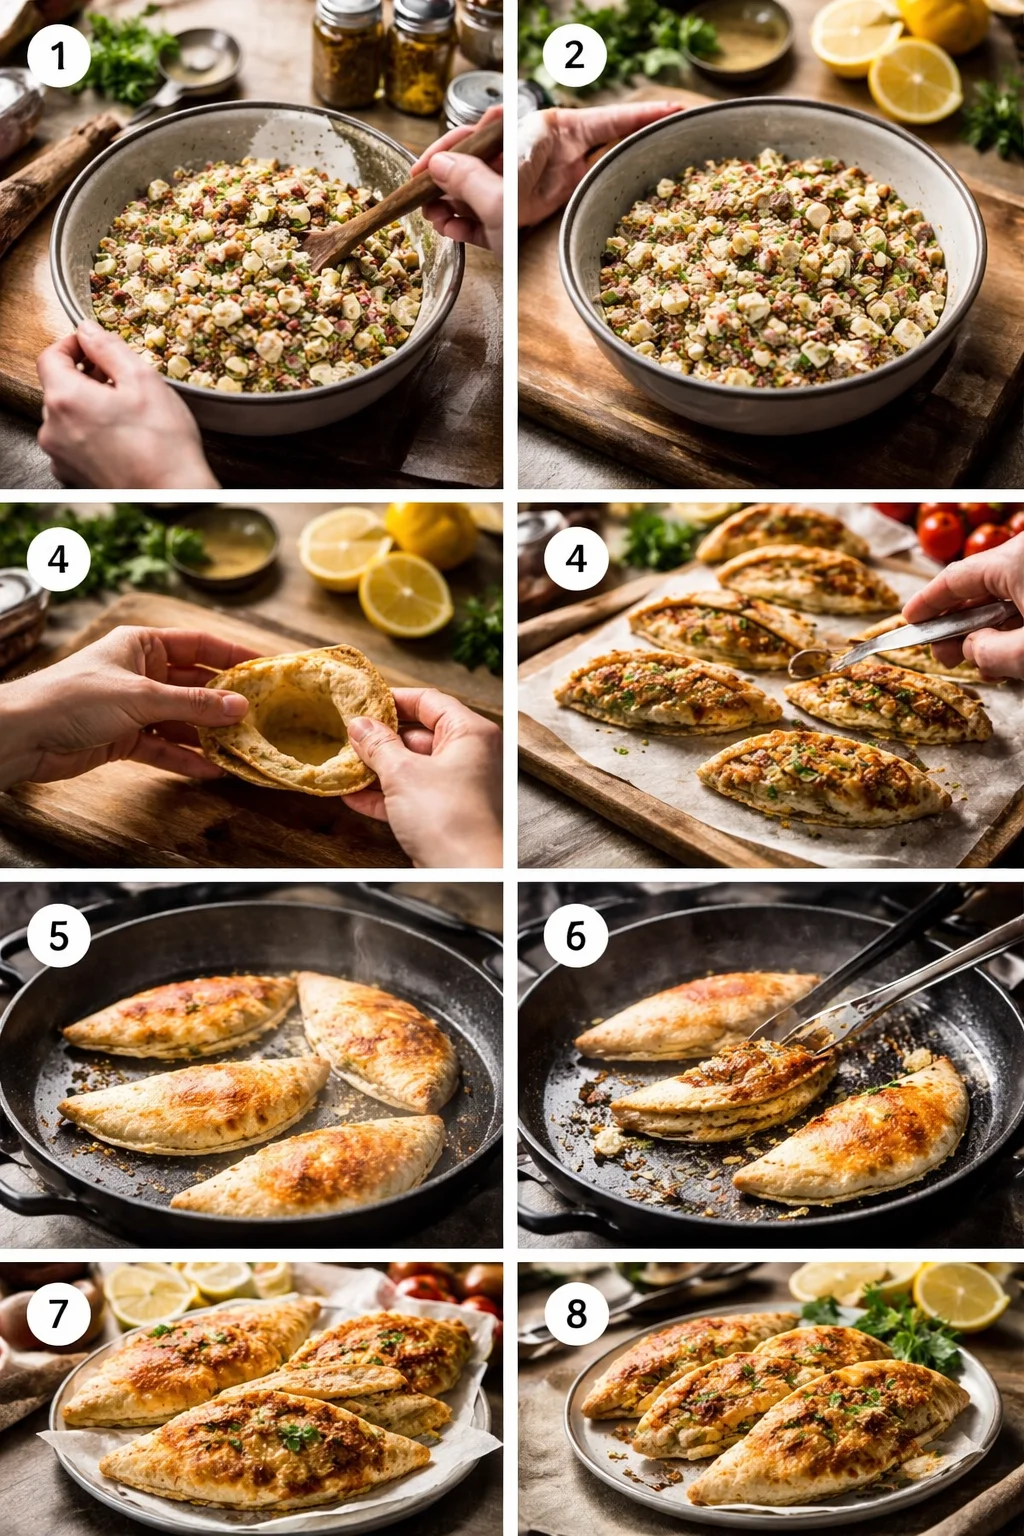
Step 1: Mix the filling. In a bowl, combine the ground chicken, feta, garlic, onion, cumin, paprika, salt, pepper, lemon zest, and herbs. Mix until it looks evenly combined. I use a fork and then my hands for about 15 seconds. Do not overmix, it can make the chicken tight.
Step 2: Prep the pita. Carefully open each pita pocket. If your pita does not open easily, warm it for 10 seconds in the microwave with a damp paper towel. That softens it just enough to avoid tearing.
Step 3: Stuff it. Spoon the chicken mixture into the pita, then press it flat so it spreads into a thin layer. Think thin like a quesadilla filling, not thick like a burger.
Step 4: Crisp it up. Heat a skillet over medium heat. Add a little olive oil, then place the stuffed pitas in the pan. Cook 4 to 6 minutes per side, pressing gently, until the outside is golden and the chicken is cooked through. If you are unsure, cut one open and check. The chicken should be fully cooked with no pink.
Step 5: Rest and slice. Let them rest 2 minutes, then slice into halves or wedges. Add a squeeze of lemon right at the end. It makes everything pop.
If you want an oven option: bake on a sheet pan at 425 F for about 14 to 18 minutes, flipping once. Brush the outside with olive oil so it still gets that crunch.
And if you are the type who loves crispy chicken recipes in general, this one is a fun cousin: crispy baked parmesan chicken. Different flavors, same satisfying crunch.
“I made this on a busy Tuesday and my kids ate it without negotiating for once. The pita stayed crisp and the feta made it taste like takeout, but better.”
Meal Prep and Storage Suggestions
This recipe is sneaky good for meal prep, especially if you like quick lunches that do not feel sad. I have made Crispy Pita with Chicken & Feta ahead for a couple days, and it still holds up if you reheat it the right way.
How I prep it for the week
Option 1: Mix the filling ahead. You can mix the chicken filling and keep it in the fridge for up to 24 hours before cooking. After that, it is still safe a bit longer, but the texture is best when cooked sooner.
Option 2: Cook and store. Let the cooked pitas cool completely, then store in an airtight container.
Storage basics:
Fridge: 3 to 4 days.
Freezer: You can freeze them, but I recommend freezing the cooked filling instead of the assembled pita. Pita can get a little weird after freezing.
Reheating: Use a skillet or toaster oven so it crisps back up. Microwave works, but you will lose that crunch.
One more thing I learned the hard way: if you are packing it for lunch, keep any sauces separate. A little container of yogurt sauce on the side saves the pita from getting soggy.
If you are planning a meal prep lineup, you may also like this bowl situation for another day of the week: grilled chicken broccoli bowls with creamy garlic sauce. It is great when you want something filling but not heavy.
Serving and Pairing Recommendations
This is where you can really make it feel like a full meal without doing a ton of extra work. I usually set everything on the counter and let people build their plates. It feels casual, and everyone gets what they like.
My favorite ways to serve Crispy Pita with Chicken & Feta:
- With a quick yogurt sauce: Greek yogurt, lemon juice, garlic, salt, and a drizzle of olive oil.
- With a chopped salad: cucumber, tomato, red onion, and a little vinaigrette.
- With roasted veggies: zucchini, bell peppers, or even broccoli.
- With something cozy: a simple soup on the side in colder months.
For drinks, I like sparkling water with lemon, iced tea, or honestly just whatever is cold and in the fridge.
Common Questions
1) Can I use rotisserie chicken instead of ground chicken?
Yes. Chop it very finely and mix with feta and seasonings. Since it is already cooked, focus on crisping the pita and warming the filling through.
2) How do I keep the pita from tearing?
Warm it for a few seconds so it softens, then open gently. Also do not overstuff. A thinner layer inside is your best friend.
3) What sauce goes best with it?
A lemony garlic yogurt sauce is my top pick. Tahini sauce is also great if you want something nuttier.
4) Can I bake it instead of pan frying?
Definitely. Brush with olive oil and bake at 425 F, flipping once, until crispy and cooked through.
5) Is feta the only cheese that works?
Feta is the classic salty punch here, but you can mix in a little mozzarella for stretch. Just do not replace all of the feta or you lose that signature tang.
Okay, go make this tonight
If you have been craving something crunchy and satisfying, Crispy Pita with Chicken & Feta is such a solid win for a busy night. It is easy, it is flavorful, and it feels way more exciting than another basic chicken dinner. If you want to compare ideas or try a different spin later, check out Arayes: Crispy Pita with Chicken & Feta – Recipe – OnTrac5, or for a more classic pocket style, Grilled Greek Chicken Pitas (+ Meal Prep Option) | Good Life Eats®. And if you are into that smoky grilled flavor, you will probably love Smoky Grilled Chicken Pita Flatbreads with Creamy Feta. Give this one a try, tweak it to your taste, and let it become one of those recipes you can pull off even when your brain is done for the day. 

Crispy Pita with Chicken & Feta
Ingredients
Method
- In a bowl, combine ground chicken, feta, garlic, onion, cumin, paprika, salt, pepper, lemon zest, and herbs. Mix until evenly combined.
- Carefully open each pita pocket. If they do not open easily, warm them for 10 seconds in the microwave with a damp paper towel.
- Spoon the chicken mixture into the pita, then press it flat so it spreads into a thin layer.
- Heat a skillet over medium heat. Add a little olive oil, then place the stuffed pitas in the pan.
- Cook for 4 to 6 minutes per side, pressing gently, until the outside is golden and the chicken is cooked through.
- Let them rest for 2 minutes, then slice into halves or wedges. Add a squeeze of lemon right before serving.
- Alternatively, bake on a sheet pan at 425°F for about 14 to 18 minutes, flipping once.
Leave a Reply